Foodiva's Kitchen: November 2010

Tuesday, November 30, 2010

Date and Orange Mascarpone Fritters & YBR November


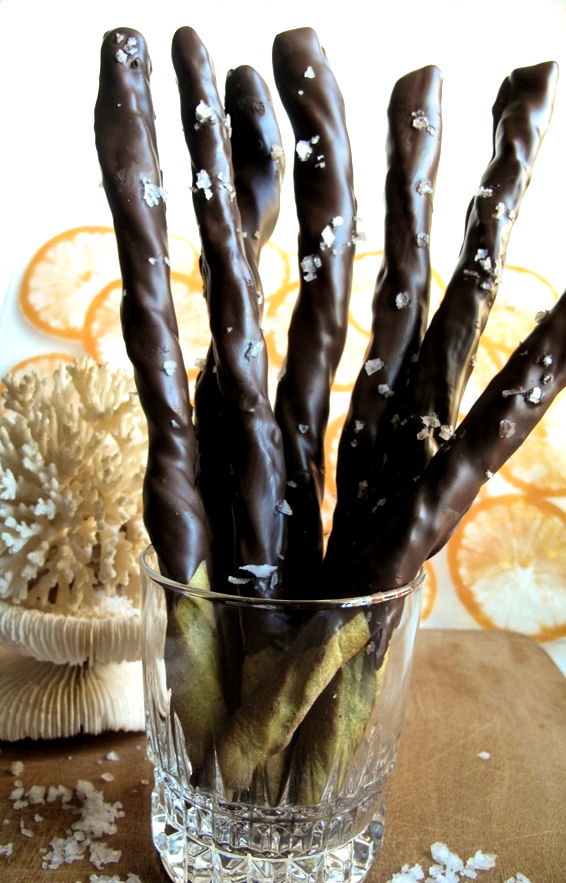
If you feel like doing something very easy but still unusual for dessert next time you have some guests over for eats, then I have just the recipe for you. Dates are now in season and if you happen to have them in abundance in your pantry, you can whip these simple fritters up. Fill the pitted dates with the flavors of orange (zest) and creamy mascarpone, toss them in orange (juice) batter and fry. See... easy like Sunday mornings.


These are best made by using the sweet, thick, fleshy medjool dates which grow in Egypt and California. I didn't have any medjool on hand but a friend had just brought back and gifted me some dates from Saudi Arabia, so I used those instead. Not as large nor as fleshy, but they were just as sweet. Once coated in batter and deep-fried, the mascarpone just melts in your mouth as you bite through the batter. I would serve these warm with Cinnamon or Vanilla icecream, or both, why not?


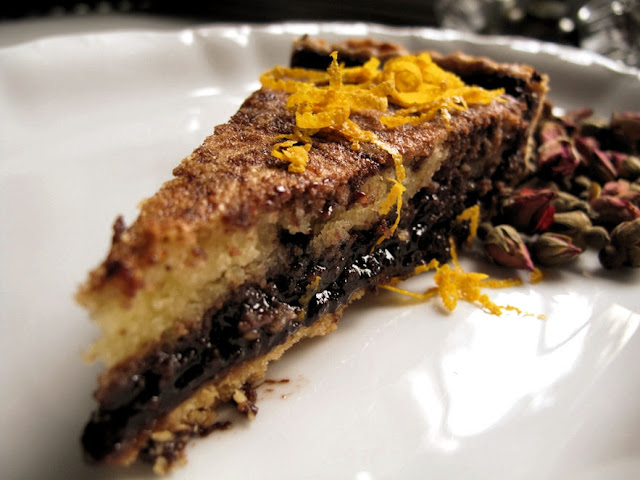
Last time I fried up a batch of these fritters, I ate about 10 of them all by myself, curled up in bed with a cup of hot, creamy chocolate. While watching The Biggest Loser on TV. How ironic.

Date and Orange Mascarpone Fritters
Makes 20 fritters, serves 4
Ingredients:
20 medjool dates
Finely grated zest of 2 oranges
8 tablespoons mascarpone
Plain flour, for dusting
Oil, for frying

Batter
300ml freshly squeezed orange juice
100g (4 oz) self-raising flour

Method:
1. Split the dates along one side and remove the seeds. Set aside.
2. Mix the orange zest with the mascarpone. Stuff the dates with the mascarpone mixture and push back into shape.
3. Make the batter by whisking flour and orange juice together until smooth, getting rid of lumps. Heat the oil for deep-frying.
4. Dust the dates with flour and then drop them carefully one by one into the batter to coat. Lift the dates out of the batter with a spoon and place gently in the hot oil. Cook for 4-5 minutes until completely crisp and golden. Lift from the pan onto a plate lined with kitchen paper to absorb any excess oil.
5. Serve the fritters warm or cool with cinnamon or vanilla ice-cream.


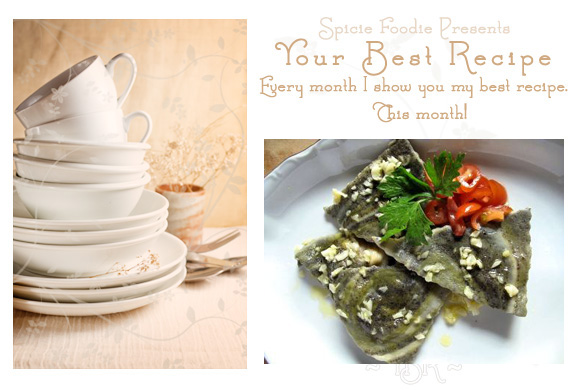
One last thing, as you may know, Nancy of Spicie Foodie is hosting the Your Best Recipe event starting from last month. For November, I've submitted my recipe for Spiral Ravioli, in the mysterious (natural) hues of green, black and white. To check out mine and other bloggers' best recipes via Nancy's round-up, please click here.

Have a great 'date' with these fritters, peeps! (Cheesy, I know).

Sunday, November 28, 2010

My Love in Black and White (or Gunmetal Grey)

I gave you all the love I got
I gave you more than I could give
I gave you love
I gave you all that I have inside
And you took my love
You took my love

No Ordinary Love, song by Sade


During the years when I was still stumbling around in the dark trying to search for my soulmate, my favorite go-to songs for romance have mainly been the ones sung by Sade. Her public persona has always been elegant, mysterious, sexy, seemingly just-out-of-reach... everything I'd aspired to be - well, back in the heydays, anyway. Nowadays of course, I've moved on to become the person I am, my own person, and I'm happy with the way things are. Only once in a (very rare) while, when it's just me and my iPod and no chattering kids, family members or friends in the vicinity, the soothing sound of Sade's melodies still draws me in, lulls me. Her voice, smooth as liquid gunmetal, and her words reside in a small corner of my mind, I know them all by heart.


Below's music video of No Ordinary Love was actually released back in 1992. Nearly two decades later, this gorgeous woman seems not to have aged a single day! The fact that she's portraying a mermaid here resonates with my natural love of the sea and scuba diving shenanigans. More than once, I imagined Sade-the-mermaid as, ummm, me... (okay, permission to laugh all you want).


My recipe today was an effort to celebrate my triumphs in love (who really cares about the failures?) by making something as smooth and enchanting as that liquid gunmetal voice. In a shade of gunmetal grey, even.


The challenge was not merely how to get the exact hue, but also how to make such a dark grey-colored dish edible and purposefully alluring if it's ever handed to someone on a plate. I decided to try a simple tart, with very minimal oven time. Sound good so far? I toyed with the idea of creating a very stormy grey crust with a pure white (ie. non-cooked) filling. Black sesame have been a feature in several of my recipes lately, but hey, my stock hasn't yet run out and I had to utilize this ingredient again to get that very, very dark crust. When my crusts came out of the oven, you would've found me doing my jiggy dance of joy because they'd turned out in the exact shade that I wanted - gunmetal grey, baby!


Since this tart is all about the dark and also beautiful aspects of love, I felt the nutty-flavored black sesame crust would contrast nicely with a smooth, rich and creamy Mascarpone filling. A blackened heart positioned smack in the middle signifies my love - stamped in black and white, for always.


Mascarpone Tart With Black Sesame Crust
Makes 12 mini-tarts/one 12-inch tart
Ingredients:
Crust
150g plain flour
100g black sesame powder
125g butter
1 egg
100g caster sugar

Filling
1/2 cup cold milk
3 teaspoons powdered gelatine
250g whipping cream
1/2 cup caster sugar
250g Mascarpone cheese
2 teaspoons black sesame powder

Method:
1. Preheat the oven to 200°C.
2. Make the crust first: Place the butter, flour and black sesame in a bowl. Rub the butter into the flour with your fingertips until it resembles breadcrumbs. Make a well in the centre of the bowl, add sugar and break an egg into it. Knead with your fingers until you get a pliable pastry mixture.
4. Grease the tart tins with butter. Roll dough into little balls and press into the base of the tart tin. Roll reemaining dough in between your palms to form 'ropes', arrange this against the inside edge of the tin and press against the edge to flatten and form the wall of the crust. Prick the base with a fork and bake in the oven for about 15 minutes. If you’re using a standard pie-tin, bake blind for 15 minutes, then reduce heat to 180°C, remove the parchment paper and baking beans and bake crust for another 10 minutes. Take out of the oven and set aside to cool. Once cooled, release crust gently from the pan and place on a plate or tray.
5. For the filling, add the gelatine to the cold milk in a small pan to soften it, then heat the pan gently, stirring to dissolve the gelatine. Do not allow the milk to boil. Remove pan from the heat and set aside to cool.
6. In a bowl, beat the whipped cream and sugar until it forms soft peaks, then fold in the mascarpone and cooling gelatine mixture. Pour 1/4 cup of this mascarpone into a small bowl and add 2 teaspoons black sesame powder.  This dark mixure will be used to form the heart designs against the white filling.
7. Spoon or pour light mascarpone mixture carefully into tart crust up to very near the top. Bear in mind there is no baking involved after this, so the filling won't expand. Smooth the surface with a spatula, then spoon small dollops of dark mascarpone on parts of the white filling. Carefully drag the tip of a small knife across the dark mixture, forming a heart shape.
8. Chill tray in the refrigerator for about 4 hours or overnight until the filling is set. Serve cool or at room temperature.

Wednesday, November 24, 2010

Savory Chocolate Curry Puffs With Purple Sweet Potato Filling

Man's mind consists of Dao-mind and human-mind, which are all given by God. Everything being perfect and perfect in Dao-mind, nothing needs to depend on outside oneself or search for anything. Dao-mind is like a mirror which reflects God's love and wisdom.

An excerpt from Confucianism and Meditation
 
Everything about the title of this dish sounds wrong, doesn't it? Let's see... savory + chocolate + curry + sweet potato. Conflicting yet harmonious. Despite the seeming clash of flavors, these curry puffs turned out well and tasted mmm.... slightly better than well ;-). Confusion or Confucianism, which is it really?
 
Anyway, I was inspired to come up with these spiral curry puffs recipe after reading this post on Sweet Potato and Black Bean Empanadas by the lovely Victoria of Mission: Food, where nothing is impossible. Yes, correctly so, my dear. Empanadas in my neck of the woods are called curry puffs, because the filling is frequently made of curried meat or vegetables, or even both.
 
Sorry to disappoint, but here comes the disclaimer. The only chocolate you'll find in these flaky puffs are in the color of the pastry dough attributed to the cocoa powder I added to it. The spiral effect was made using two types of dough, oil dough and water dough. Their properties when cooked are different, thereby separating the doughs, lifting the spirals and making the pastry light and flaky. I've collated a series of photos below to show you how to create these pretty spirals. Even if you make the two types of dough in plain or the same color, the concentric circles will still be visible. How cool is that? I credit the Thais for popularizing this technique to make their curry puffs, and by golly, they do it extremely well!  


My fillling, however, was my own invention and contained purple sweet potato (my favorite!), carrots and long beans picked from my mother's garden over the weekend. All these lovely ingredients were coated in a curry paste made from scratch. I must tell you that one of the loveliest smells on earth is the smell of freshly ground curry sizzling in a hot pan... it's like breathing in the air over at spice heaven. Mine was probably the easiest curry paste to make, just place all the spices in a grinder, press the 'on' button and voila! I only used 7 easily-available spices, it was a breeze really. 

 Ingredients for my curry paste
 Vegetable filling. Colorful enough for you?

My mother has been trying to get me to make these spiral puffs for years, but my inner teenager has always resisted. What's wrong with the usual, non-spiral curry puffs anyway? It took me until today when I actually made these to realise that the years of culinary defiance are really pointless, and honestly, a great loss on my part. I really did enjoy the process of enveloping dough within dough, then rolling, turning and rolling the dough again to produce the unusual, swirling patterns on the crust. Although, I'm not sure what my mother would say about a chocolate curry puff... Ah well, that teenager will always be a part of me. ;-)


Okay, time for the taste test. Filling was incredible, thanks to the aromatic homemade curry. Crust bore no distinct chocolatey taste and was delightfully light and flaky, but I suppose if it was a bit more flaky, the puffs would've been even better. The water dough looked a tad too dry to me (damn that cocoa powder), so perhaps reducing the amount of cocoa used would improve the consistency. Yes, yes I know. I'm a cursed perfectionist. But I don't apologize for it if I can come up with bizarre yet delicious curry puffs as this!

Flaky and flakier!
  
Savory Chocolate Curry Puffs With Purple Sweet Potato Filling
Makes: 16
Ingredients:
Water Dough
2 cups plain flour
1/2 teaspoon salt
2 teaspoons caster sugar
1/4 cup Dutch-processed cocoa powder
100 ml vegetable oil
120ml water cold water

Oil Dough
1 cup flour
80ml vegetable oil

1 egg, beaten lightly for glazing

Filling
Curry paste:
1 onion chopped
3-4 cloves garlic
1/2 inch piece ginger
1small stick cinnamon
1/2 teaspoon cumin
1/2 teaspoon coriander
1/2 teaspoon chilli powder
1/2 teaspoon turmeric powder
2 cloves
1 cardamom
5-6 cashew nuts
4 tablespoons of oil
1 cup tomato puree

Vegetables:
300g purple sweet potato, peeled and diced
5 Chinese long beans, sliced into 1/4 inch pieces
1 large carrot, peeled and diced

Method:
For the Filling:
Grind all the dry ingredients with the onion, garlic and ginger into a fine paste in a grinder. Heat a thick pan and add 4 tablespoons of oil, fry the paste on medium heat, stirring constantly until aromatic and the paste leaves the sides of the pan. Then add the tomato puree, mix and cook for a minute.
Add the sliced potatoes, carrot and long beans to the curry mixture. Simmer under low heat for about 15 minutes, until the liquid reduces and the vegetables are softened. Season with salt and pepper, to taste. Leave to cool completely before using this filling. You can also leave this overnight in the refrigerator for use the following day, the mixture will be thickened and easier to handle.

For the Pastry:
Water Dough:
Place flour, sugar, salt, cocoa powder and oil in a bowl and mix with your hands until it resembles breadcrumbs. Slowly add the cold water, press together and knead lightly into a smooth ball of dough. Cling wrap the dough and refrigerate for 20 minutes.

Oil Dough:
Place flour in the mixer bowl. Add oil and mix with your hands until it forms a soft dough. Shape into a smooth ball, cling wrap and chill dough for 20 minutes to firm it up.

To form spirals:
Divide the water dough into 8 equal pieces, do the same with the oil dough.
Flatten the water dough into a circle and wrap it around the ball of oil dough, pinching the edges together at the top to seal.
Place the wrapped dough on the worktop and press down with the palms to flatten it. Using a rolling pin, roll dough out to a rectangular shape.
Working from the short end, roll up tightly into a Swiss roll. Flatten this cylinder again and roll out pastry to a rectangle. Roll from the short side into a Swiss roll (in other words, do this rolling process twice). Cut roll into 2 pieces of about 1 inch/2 cm thick (altogether you will have 16 pieces of sliced dough). Flatten and roll out this piece of dough on the cut side and you will see the spiral pattern.

To fill the spiral dough:
Take a flattened piece of dough and roll into a circle. Place a tablespoon of filling in the centre.
Brush the edge with water and fold pastry into half, press the edges together to seal and pinch with thumb and forefinger to crimp the edges.
Place each finished puff on the tray, cover with a sheet of cling wrap, while you fill the remaining dough. Refrigerate until firm.

To bake:
Preheat the oven to 200C. Brush the top and crimped edges of the curry puffs with the beaten egg, and bake for 15-20 minutes, until the white parts of the crust are golden brown. Serve warm.


Sunday, November 21, 2010

International Incident Party: Chocolate-Matcha Grissini With Anglesey Sea Salt


For a period when I was a teenager, we lived in a house right in front of the beach, with a view looking out towards the South China Sea. Even on the days when we didn't step onto the sandy shore, the saltiness of the sea permeated everywhere. We felt it and tasted it in the air we breathed, in the stickiness of our skin/hair/clothes, whenever we licked our lips. We also saw the destruction it caused, the most memorable of which was the premature aging of my bicycle, my then precious form of transport for explorations around the neighborhood. The salty air had quietly chewed away at the metal, leaving behind a rather sad, rusty frame.

Since then, I've had a 'frenemy' (love-hate) type of relationship with salt. My salt tolerance level is pretty low and I'm often wary of using too much salt in my cooking. On the other hand, very little of it will leave my tastebuds puzzled and yearning. For this month's International Incident Party (theme: Salt), I decided it's time I pay my respects to this most basic of flavorings. 


Lately, out of curiosity more than anything else, I seemed to have acquired several different salts to add to my pantry: pink, coarse Himalayan salt (origin: Pakistan), translucent white Anglesey Sea Salt (origin: Wales, UK) and flaky, pink Murray River Salt (origin: Australia). Now, which one to use for this party?

I'm more than a little obsessed by these pretty diamond shapes! Pity they're only salt crystals...

I decided to go with the Anglesey Sea Salt because my recipe is Matcha Grissini coated in dark chocolate, and the white, coarse sea salt would show up well sprinkled against the chocolatey backdrop. Anyone who has ever baked these crisp, Italian breadsticks will tell you they're a breeze to make, but the oriental matcha and decadent chocolate coat probably lends the illusion that it takes many moons to produce (instead of the 2 hours it actually took me). I've also added extra salt and black pepper to the grissini because these are the grown-up version, to tease our palates with their sweetness, saltiness, spiciness and slight bitterness due to the green tea. Kids will equally love to munch on these chocolate breadsticks, just leave out the matcha, black pepper and sea salt.


Eat them as a snack, dip them in hot chocolate or coffee, then sit back and watch the world go by. 


Usual thanks to Penny of Jeroxie - Addictive and Consuming Blog for hosting this great party!

Chocolate-Matcha Grissini With Anglesey Sea Salt
Makes about 25 pieces
Ingredients:
2 tsp active dry yeast
1 tsp sugar
1 tblsp salt
1 ½ cup bread flour
¾ cup whole wheat flour
2 tblsp matcha powder
2 tbsp olive oil
¾ to 1 cup warm milk
1 tsp crushed black pepper
300g dark chocolate, melted
Anglesey Sea Salt, for sprinkling

Method:
1. Put the flours, matcha, yeast, sugar, black pepper, salt, olive oil and salt in a large mixing bowl. Add the warm milk slowly, you may need only slightly less than a cup. With a dough attachment, mix until the mixture becomes a soft and elastic dough. The dough can then be kneaded by hand, it should be smooth and slightly moist, but not sticky.
2. Place dough in a well-oiled bowl. Cover bowl with a damp cloth and allow the dough to rise in a warm place for about an hour.
3. Divide the dough into two. Take one piece and roll out into a thin rectangle (about 1/4 of an inch high). Using a pizza cutter cut the dough lengthwise into strips which are approximately 1/3-inch and 10-inch long. Do the same with the remaining piece of dough.
4. Twist each strip from both ends and place the strips on a greased or lined baking tray. Allow them to slightly puff up (about 10 to 15 minutes). Bake the grissini at 210C for about 15 minutes. Cool on a rack before coating with chocolate.
5. For the chocolate glaze: Chop the chocolate into 1/2 inch chunks and melt in a double boiler or in the microwave. Pour the melted chocolate onto a flat platter and proceed to dip and roll the grissini in it. Work quickly as the chocolate will harden halfway through this coating process. If it does, just warm it on medium heat in the microwave.
6. Sprinkle the sea salt on the chocolate-covered part of the grissini while it is still moist. Place grissini to dry on waxed baking paper. Serve immediately or else, store in an airtight container in a cool place for up to 3 days.


Friday, November 19, 2010

The Fifth Taste - Nori Cookies


There are days when the stubborn craving for umami takes over the mind, and won't let go. So-called the 'fifth taste', the indistinct, lingering flavor of umami - not sweet, not sour, hot or salty but possibly a combination of somewhere in between all/some of these - can so often leave you wanting more. Today (takes a deep breath) seemed like one of those days for me.


Fortunately, there are natural ways to achieve umami without resorting to the use of monosodium glutamate (MSG), which, by the way, is strictly banned in my home due to health reasons. Seaweed is one type of food that contains an abundance of free glutamates and on a day like today, I count my lucky stars that we always stock tons of nori (dried seaweed sheets) in the pantry. However, rolling sushi wasn't even on the cards because I didn't particularly feel like doing hard labor just to get this craving out of the way.


Umami enhances foods it is combined with, making other flavors richer and more intense, so it made me wonder, how would nori taste in cookie-form? A sweet-savory combination sounded like a winner to me, and who doesn't like a good cookie? I took a basic shortbread recipe, blended in shredded nori, added extra salt and coated the edges in more nori. The result, these Nori Cookies, were totally Zen.


They are very simple to bake, elegant to look at, are unusually, delightfully tasty and can be served either as pre-meal nibbles or post-meal with coffee. Or simply feast on them while typing a post up like I'm doing right now, with bits of renegade nori landing like fine, green feathers on my keyboard. Really, a messy workspace is a small price to pay for a craving well-satisfied!


Nori Cookies
Makes 25-30 cookies
Ingredients:
6 tablespoons (90g) unsalted butter, at room temperature
2 teaspoons salt
3 nori sheets, shredded finely in a food processor
9 tablespoons (110g) powdered sugar
1 egg
1½ tablespoons olive oil
2 cups plus 2 tablespoons plain flour

1. Mix the butter, salt and 2 tablespoons of the shredded nori until smooth. Beat in the powdered sugar, then the egg yolk.
2. Scrape down the sides, then add the olive oil and flour, beat until smooth.
3. Roll the dough into two logs, each about 8-inch (20 cm) long. Roll each log on a bed of shredded nori until fully coated. Wrap each roll in plastic film and chill until firm enough to slice, about 1 hour.
4. To bake the cookies, preheat the oven to 300F (150C). Line a baking sheet with a silicone mat or parchment paper then slice the cookies about ¼-inch (½cm) thick. Place them evenly spaced on the prepared baking sheet. Bake for 15-20 minutes, or until slightly-firm. Cool completely before serving.

Tuesday, November 16, 2010

Safflower and Lavender Savory Loaf


It's really ironic that I have this food blog because although I've always loved to eat, cooking hasn't come easily nor naturally to me. The people who know me very well wouldn't automatically associate me with an apron or a whisk, or even a broom. I cannot recount many childhood memories of being in the kitchen, happily stirring something delicious on the stove whilst being imparted with useful culinary knowledge from some whiz-in-the-kitchen elderlies. Of course, I'd had plenty of opportunities to learn how to be a good cook, but being in the kitchen was for me a big, tiresome chore. My childhood was spent mostly outside my home, exploring the neighborhood and nature, being up trees, climbing up hills, swimming in rivers or the sea. Those are the things that made me truly happy. Ah well, they still do. 


It's a bit like being in an arranged marriage, this cooking business. I approached it with a certain amount of wariness to begin with, then got slowly used to it and finally, fell insanely in love. Now, being in the kitchen seems somehow normal. Like it was always meant to happen. Such has been the tumultuous history of my relationship with cooking.

Now, science is different. When our worlds collided (I was maybe about 11 or 12), it was love at first sight! I'm talking about grown-up science - chemistry, biology, physics - I loved them all, especially chemistry. My favorite teacher of all time was Mr. P, he taught us chemistry for 2 years. He was some kind of fierce but had a big, caring heart that overrode all his (fake) dictatorial acts. My classmates and I adored him to bits and his greatest legacy was probably to instill in us a passion for this fascinating subject of chemical reactions. Half the class went on to have illustrious careers in the medical, pharmaceutical or petrochemical fields, while the other half went on to other of life's possibilities (guess which half I'm in?). I'm pretty sure that all of us ended up being good cooks, though. The common denominator of those vivid and exciting chemistry lessons we all had with Mr. P probably benefitted us in ways we never, ever imagined.

Chemistry may well have landed me here, writing this blog. Except now the chemical components are (mostly) edible and the lab is my very own kitchen. Mr. P had passed more than a decade ago but I'm sure he oftentimes watches over me while I conduct my kitchen experiments, sharing some chemistry tips, his roaring voice circling in my head. From the bottom of my heart, thank you forever for your kindness and dedication, Mr. P.


Today's flowery recipe was another experiment that ended up rather well. A friend had recently mailed me some safflower (Turkish saffron) she'd bought at the Spice Market in Istanbul, Turkey. The red-yellow florets are similar to saffron, but they're not thread-like nor as expensive as saffron. While safflower does when steeped give that lovely golden yellow color to dishes, the flavoring it gives off is much subtler than saffron. It is one of the oldest crops in mankind's history, with records of its use dating back to the twelfth dynasty of ancient Egypt (1991 BC). The fact that this spice has been in circulation for so long just intensified my curiosity to use it. Only, I had no idea what to do with it. Hmm.. I wonder what an Egyptian Queen would do in her kitchen with safflower? Wait, does she even go into the kitchen? :-}

I had dried lavender flowers left over from a previous International Incident Party recipe, so I thought it would be good to combine both flowers in one dish. It was a long shot, not knowing how the end product would taste like. I hadn't wanted to make anything sweet as my body could really do with a sugar-break right now, hence this savory but flowery-tasting loaf which really seemed like a breath of fresh air (literally)! It had been a while since I'd baked bread so I decided to have some fun with this one and send it to Susan's Yeastspotting.


I started by caramelising some onions and kneading these into the bread dough, followed by the safflower and lavender (separately, of course). I then took some Chinese chives or garlic chives which I rolled up inside the dough and finally stacked these rolled dough pieces up on top of each other inside a loaf pan. Asparagus would be good too if you don't fancy chives. The safflower and lavender dough rolls were arranged alternately in the pan and when the loaf was baking in the oven, the aroma it gave off was unlike anything I've ever smelled before! Can you imagine it... the sweet smell of roasted onions interlaced with the distinctive scent of lavender and a whiff of safflower?


Yes, there definitely is a difference between cooking and kitchen chemistry. This loaf was a pure joy to make and even better to eat. I had so much fun making this, and I know that's exactly what Mr. P would've wanted!   


Safflower and Lavender Savory Loaf
Ingredients:
• 2 large onions, diced
• 3 tablespoons olive oil
• 4 cups bread flour
• 2 1/2 teaspoons instant dried yeast
• 1 teaspoon sea salt
• 1/2 teaspoon ground black pepper
• 2/3 cup lukewarm milk
• 2/3 cup lukewarm water
• 1 heaped teaspoon safflower (Turkish saffron)
• 1 heaped teaspoon dried lavender flowers
• 6 stalks Chinese chives (garlic chives)
• 1 tablespoon butter, melted

Method:
1. Lightly grease a 25 x 10cm (10 x 4 inch) loaf tin. Sauté the onions in hot olive oil until soft and light golden. Set aside to cool.
2. In a large mixing bowl, mix the yeast, salt, pepper and flour. Stir in the cooled sautéed onions. Make a well in the centre, add the water and milk and knead with your hands or using a dough hook attachment to form a soft dough. Turn out on to a lightly floured surface and knead for 10 minutes until smooth and elastic.
3. Divide dough into 2 equal portions. Take another portion and knead in the safflower. To the second portion, knead in the lavender flowers until fully incorporated.
4. Place each dough in separate, lightly-oiled bowls. Cover and let rise in a warm place until doubled in size, about 1 hour.
5. Punch each dough down. On a lightly floured surface, roll one dough portion into a flat, rectangular shape. Place 3 stalks of Chinese chives along one long edge, and start rolling the dough forward into a cylinder, wrapping the chives inside it.
6. Cut off both ends of the chives protruding out of the dough, and slice roll into 12 equal pieces. Repeat this process for the second dough.
7. Alternating the safflower and lavender doughs, arrange 6 pieces of each in the prepared loaf tin (so 12 pieces altogether). Brush with some melted butter, then top with the remaining slices of dough. Brush tops with melted butter. Cover with oiled clear film and let rise until doubled, about 45 minutes. Bake at 190C/375F for 40-45 minutes.
8. Brush tops with more melted butter as soon as the loaf comes out of the oven. Leave to cool in the pan for 5 minutes before turning out on a wire rack.

Thursday, November 11, 2010

Poetry Thursday #9: The Bakewell Tart That Wasn't

 Poetry Thursday #9: 
Beautiful dreamer, out on the sea,
Mermaids are chaunting the wild lorelie;
Over the streamlet vapors are borne,
Waiting to fade at the bright coming morn.
Extract of Beautiful Dreamer, Stephen Foster


Sometimes friendships begin in the unlikeliest of places. Like the bottom of the sea. No, I'm not alluding to the Mermaid Underwater Alliance nor to witty, talkative fish adorably nicked Nemo and Dory. I'm referring to diving buddies, mine in particular. When I decided to take up scuba diving a few years ago, I had just celebrated a milestone birthday. Not exactly an age to be taking up any sport of that (risky, foolhardy, wondrous) kind, but then one can't dictate when one is ever ready to do anything in this life - you just know when you've reached that point that you are, well, ready

The Great Underwater Alliance

On my first diving trip out to sea, I was paired with a guy who I wasn't exactly enamored with. Worse, he was a colleague, and even worse than worse, he was a techie. The department I was in was creative, funky, colorful and LOUD, while the tech people just seemed stealth-like, reserved and well, staid. I hadn't gotten along very well with them. Other than the fact that I had nothing in common with anyone on the technical team, they often ignored and sniggered at my trouble-shooting pleas! So seeing that my first dive buddy, whose task was to look out for my well-being while we were underwater (and vice-versa), was from the 'nemesis' camp, it gave me a baaaad, sinking feeling. If he'd wanted revenge, that was the time. I might as well have drowned myself there and then. And he was probably thinking the very same thing.

But oh, how wrong I was! Who I discovered that day was a kind, responsible and yes, even funny guy who checked all my diving equipment thoroughly before each dive and made sure my oxygen levels were always adequate (we funky, creative ones can get carried away with the fascinating view down there in the sea, you know what I mean?). As I result, I felt safe and from then on, the techie and I became more than just dive buddies. We became friends. No longer were my working days filled with frustration whenever something went technologically amiss.

So how does this story segue into bakewell tart? I'm not quite sure how it does, and if it does at all. I guess what I'm trying to say is that stereotyping people and things certainly did not help me grow as a human being and whenever I've done it, it often surprises me. Some people/things are just not whom/what they seem. Like this bakewell tart, for instance. As a young adult, I had lived in the United Kingdom for close to ten years and in all that time, never once did a bakewell tart pass through my lips. The people of Derbyshire, where this dessert originates, will probably kill me for saying this, but the tart looked to my mind so sickly sweet and unappealing that I never desired it.


Until one day recently, of course, when a 'Best of British' cooking show on television had me enraptured with its chef's demonstration of a bakewell tart in the making. Oh dear, it hadn't looked sickly sweet at all, in fact, it looked rather appetizing! Since I've stereotyped bakewell tart so rigidly all these years, I wanted to set things right and taste one that I made myself. The components of this tart seemed easy enough - sweet shortcrust pastry lined with delicious jam, and topped with almond sponge or frangipane. My concessions were to use a rose petal and orange jam, with lots of sinful chocolate hidden underneath the frangipane layer! 


I used this recipe from the Smitten Kitchen, just replacing the jam layer with:
  • 1 cup rose petal jelly
  • 2 oranges, peeled and sliced
  • 200g dark chocolate, melted 
Boil, then simmer the rose petal jelly with the oranges for about 15 minutes until syrupy. Sieve to remove the chewy bits of orange. Spread the orange-rose jam on the base of the crust, then pour in the chocolate.

Oh lordy!

For the crust, I simply kneaded in the zest of 1 orange to add more flavor. If you do not chill the frangipane mixture for at least 2 hours (like I clearly didn't, below), the frangipane will mix into the chocolate layer slightly when you spread it. I didn't mind because I quite liked the marbly chocolate-almond effect. 


Orange-Rose-Chocolate Bakewell Tart.

This may be total blasphemy of a bakewell tart, but it's a path worth treading. I will never view this best-of-British tart in quite the same way again! 

Bake well, folks.

Related Posts with Thumbnails